
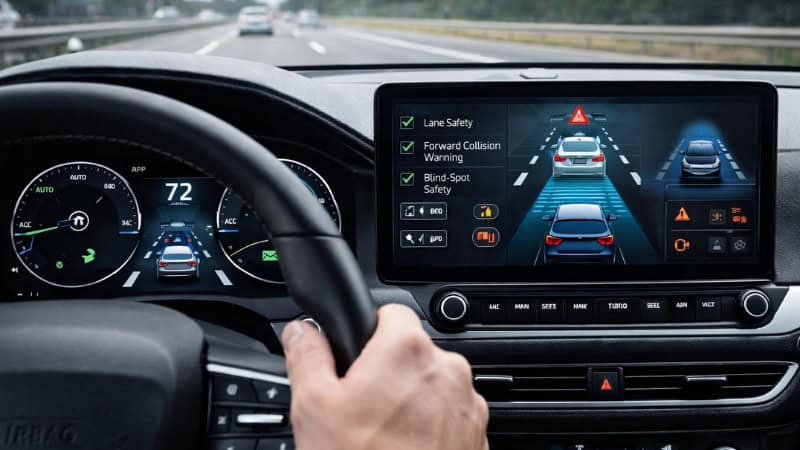
Modern vehicles aren’t just mechanical anymore—they rely heavily on cameras, radar sensors, and onboard computers to keep you safe on the road. That’s where ADAS (Advanced Driver-Assistance Systems) comes in. Features like lane departure warning, adaptive cruise control, and automatic emergency braking all depend on precise sensor alignment to function correctly.
Here’s the problem: even a slight misalignment—something as small as a few millimeters—can throw off these systems and create serious safety risks. This often happens after a windshield replacement, a minor accident, a wheel alignment, or a suspension repair.
Before we dive into the specifics, let’s explore why proper calibration matters and how the process works from start to finish. In this guide, we’ll break down everything you need to know about ADAS calibration, including cost, step-by-step process, common warning signs, and whether it’s something you can handle yourself or should leave to a professional mechanic.
What Is ADAS Calibration?
ADAS calibration is the process of precisely aligning your vehicle’s cameras, radar sensors, and control modules to the manufacturer’s factory specifications. In simple terms, it ensures that all safety systems “see” the road correctly and respond as they were designed to.
Accuracy here is critical. We’re talking inch-level (even millimeter-level) precision—a slightly misaligned front camera or radar sensor can cause incorrect distance readings, delayed braking, or false alerts. That’s why proper sensor alignment and calibration procedures are essential after repairs.
Modern ADAS features that rely on this calibration include:
- Forward Collision Warning (FCW) – detects vehicles ahead and warns of potential impact
- Lane Departure Warning (LDW) – alerts when you drift out of your lane
- Adaptive Cruise Control (ACC) – maintains a safe following distance automatically.
- Blind Spot Monitoring (BSM) – detects vehicles in adjacent lanes
Without proper calibration, these systems may not function correctly—putting safety and driving confidence at risk. To better understand why this precision is necessary, let’s look at the types of calibration involved.
Types of ADAS Calibration
Modern vehicles use different ADAS calibration procedures depending on the system design and manufacturer requirements. In most cases, calibration falls into three main types: static, dynamic, or a combination of both.
Static Calibration
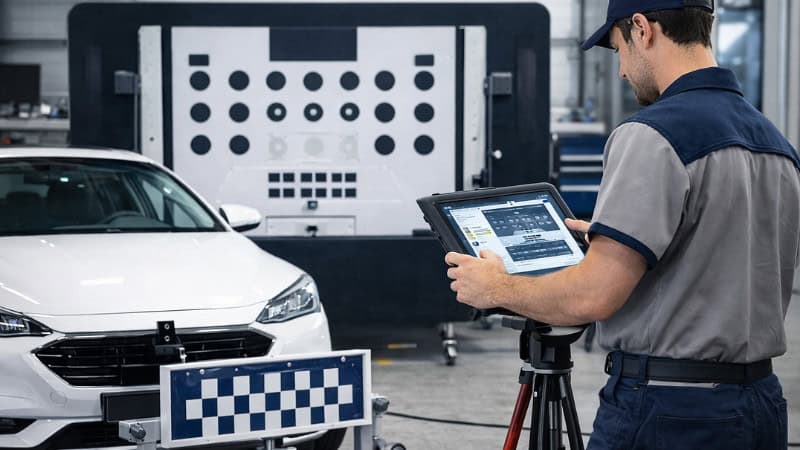
Static calibration is performed inside a workshop using specialized tools. The vehicle is positioned on a perfectly level floor, and technicians place calibration targets, laser alignment tools, or panels in front of the car.
This method requires:
- Controlled lighting conditions
- Exact measurements and positioning
- OEM-approved calibration targets
It’s commonly used in forward-facing cameras, radar sensors, and lane-assist systems where precision is critical.
Dynamic Calibration
Dynamic calibration is done while driving the vehicle under specific conditions. The car’s onboard system recalibrates itself using real-world data from the road.
This process usually requires:
- Driving at a steady speed (often 40–65 mph)
- Clear lane markings
- Good weather and road conditions
It’s often used in systems such as adaptive cruise control, lane-keeping assist, and radar-based sensors.
Combined Calibration
Many modern vehicles require both static and dynamic calibration to complete the process correctly.
For example:
- Static setup ensures initial sensor alignment.
- Dynamic driving confirms real-world accuracy.
Skipping either step can lead to incorrect ADAS readings, warning lights, or system malfunctions, which is why following the full ADAS recalibration process is essential.
When Does Your Car Need ADAS Calibration?
Your vehicle requires calibration anytime cameras, radar sensors, or mounting points are affected. Even small changes can misalign the system and impact safety.
Here are the most common situations where ADAS recalibration is required:
- After Windshield Replacement: Many vehicles have a front-facing camera mounted on the windshield. Replacing it can shift the camera position, making camera calibration essential.
- After an Accident (Even Minor): A light fender bender can misalign sensors or brackets. Even if the damage looks small, your forward collision system or radar sensor may no longer be accurate.
- After Suspension or Wheel Alignment Work: Changes in ride height or alignment angles can affect how sensors “see” the road. This impacts systems like lane keep assist and adaptive cruise control.
- After Sensor or Camera Replacement: Installing a new sensor doesn’t mean it’s ready to go. Every new component must go through proper ADAS sensor calibration procedures.
- Warning Lights on the Dashboard: If you see alerts like “ADAS system error,” “collision warning unavailable,” or “lane assist malfunction,” it’s a clear sign that calibration may be needed.
Ignoring these issues can lead to incorrect readings, delayed braking, or disabled safety features, making timely calibration critical. Next, let’s look at symptoms that may indicate your ADAS isn’t functioning as it should.
Symptoms of Bad or Misaligned ADAS
When your ADAS sensors or cameras are misaligned, the system won’t function as intended. In many cases, the signs are subtle—but they can quickly turn into serious safety issues if ignored.
Here are the most common ADAS malfunction symptoms drivers notice:
- Lane Assist Not Working Properly: The vehicle may drift without warning or give false alerts. This usually points to a misaligned front camera.
- Random or Unexpected Emergency Braking: Your car may brake suddenly with no obstacle ahead. This is often caused by incorrect calibration of the radar sensor.
- Adaptive Cruise Control Acting Erratically: The system may follow too closely or fail to maintain a safe distance, indicating poor sensor alignment.
- Dashboard Warning Messages: Alerts like “Collision System Fault,” “Lane Assist Unavailable,” or “ADAS Error” are clear indicators that something is wrong.
- Camera View Looks Off or Crooked: If your front or surround-view camera appears misaligned, it’s a strong sign that ADAS recalibration is needed.
Driving with these issues can compromise critical safety features like forward collision warning and automatic braking, so it’s important to address them as soon as possible. Now, we’ll cover what you can expect to pay for ADAS calibration.
ADAS Calibration Cost in the USA
The cost of ADAS calibration in the U.S. can vary depending on your vehicle and the type of calibration required. On average, most drivers can expect to pay between $150 and $600, while luxury or high-tech vehicles can go $800 or more.
Average Cost Breakdown
- Static calibration: $150 – $400
- Dynamic calibration: $100 – $300
- Combined calibration: $300 – $800+
What Affects ADAS Calibration Cost?
Several factors influence the final price:
- Vehicle Make and Model: Luxury brands and newer vehicles with advanced systems cost more to calibrate.
- Number of Sensors and Cameras: More sensors = more time and labor.
- Type of Calibration Required: Static calibration usually takes longer due to setup, while dynamic calibration requires road testing.
- Labor Rates: Shop location and expertise can impact pricing.
- OEM vs Aftermarket Equipment: Shops using OEM-approved ADAS calibration tools may charge more—but offer higher accuracy.
Pro Tip
If you recently had a windshield replacement or collision repair, calibration might already be included in your bill—or covered by insurance. Always double-check before paying out of pocket.
Skipping calibration to save money isn’t worth it—misaligned ADAS sensors pose serious safety risks.
How ADAS Calibration Is Done (Step-by-Step)
Calibrating an ADAS system is a detailed, step-by-step process, not based on guesswork. This requires advanced scan tools, accurate measurements, and adherence to OEM procedures. Here are the standard steps professional shops follow for ADAS calibration:
1. Perform a Full System Scan.
A technician connects an advanced OBD2 scanner to detect fault codes and determine which ADAS sensors or cameras need calibration.
2. Inspect and Prepare the Vehicle
- Check tire pressure and ride height.
- Ensure proper wheel alignment.
- Verify no physical damage to sensors.
All of this is critical before starting the calibration procedure.
3. Set Up Calibration Equipment
For static calibration:
- Place OEM calibration targets or panels at exact distances.
- Use laser alignment tools for precision.
- Ensure a level floor and proper lighting conditions.
4. Perform Static Calibration (If Required)
The system is calibrated inside the shop using targets. This step aligns the forward-facing camera or radar sensor to factory specs.
5. Perform Dynamic Calibration (Road Test)
If required, the vehicle is driven under specific conditions:
- Steady speed (usually 40–65 mph)
- Clear lane markings
- Minimal traffic
The system learns and adjusts in real time.
6. Clear Codes and Verify System Operation
After calibration:
- Clear all diagnostic trouble codes (DTCs)
- Test features like adaptive cruise control, lane assist, and collision warning
- Confirm everything is working correctly.
Important Note (Mechanic Insight)
Skipping steps or rushing the process can result in incorrect sensor readings or false alerts, which is why professional ADAS recalibration is critical for safety. But can you attempt this yourself? Let’s find out.
Can You Do ADAS Calibration Yourself?
Short answer: No — it’s not recommended.
While some basic car resets can be done at home, ADAS calibration is a different level entirely. It requires precision tools, exact measurements, and access to OEM calibration data that most DIY setups lack.
What You Would Need
To properly perform ADAS sensor calibration, you’d need:
- Professional ADAS calibration tools and targets
- A perfectly level workshop floor
- Advanced OBD2 scan tools with calibration functions
- Manufacturer-specific (OEM) procedures and software
Why DIY Calibration Is Risky
Even a small error in sensor alignment can cause
- False emergency braking
- Missed collision warnings
- Incorrect lane detection
You may not get any warning, but the system could still be inaccurate.
When DIY Might Be Possible
In rare cases, some vehicles allow limited dynamic calibration (self-learning) after:
- Minor adjustments
- Battery disconnect or reset
But this still depends on proper driving conditions and doesn’t replace full calibration.
Mechanic’s Advice
ADAS is a safety system, not a convenience feature. If it’s not calibrated correctly, it can do more harm than good. Always trust a professional ADAS calibration service after repairs or replacements.
How Long Does ADAS Calibration Take?
The time required for ADAS calibration depends on the vehicle, system complexity, and the type of calibration needed. Most jobs take 30 minutes to 2 hours, but some vehicles may require more time.
Typical Time Breakdown
- Static calibration: 1 to 2 hours (setup + precise measurements)
- Dynamic calibration: 20 to 45 minutes (road test conditions)
- Combined calibration: 1.5 to 3+ hours
What Affects Calibration Time?
- Vehicle make and model (luxury and newer models take longer)
- Number of sensors and cameras involved
- Shop setup and equipment
- Road conditions (for dynamic calibration)
Real-World Insight (Mechanic Perspective)
Sometimes delays happen not because of the work itself, but due to:
- Waiting for proper lighting or floor setup
- Finding suitable roads for dynamic calibration
- Running multiple calibration cycles to ensure accuracy
Quick Tip
Even if it feels like a long process, don’t rush it. Proper ADAS sensor calibration takes time because it directly affects critical safety systems like automatic braking and lane assist.
Is ADAS Calibration Covered by Insurance?
In many cases, ADAS calibration is covered by insurance, especially when it’s required after a repair. Since ADAS is a safety-critical system, insurers often include calibration as part of the claim.
When Insurance Typically Covers It
- After an accident (collision repair): If sensors, bumpers, or brackets are repaired or replaced, ADAS recalibration is usually included.
- After windshield replacement: Many modern vehicles have a front camera mounted on the windshield. Most insurance policies cover camera calibration as part of the glass claim.
- Comprehensive or full coverage policies: These often include necessary sensor calibration and diagnostics when tied to a covered repair.
When It May NOT Be Covered
- Out-of-pocket repairs (no claim filed)
- Routine maintenance is not linked to damage.
- Some basic or limited insurance plans
Pro Tip
Always ask your repair shop:
“Does this include ADAS calibration?”
Some shops bundle it into the repair cost, while others list it separately. Skipping it to save money can lead to malfunctioning safety systems and liability risks—so it’s always worth confirming coverage.
What Happens If You Skip ADAS Calibration?
Skipping ADAS calibration might save money upfront—but it can lead to serious safety risks and costly problems down the road. These systems rely on precise sensor alignment, and without proper calibration, they simply can’t function correctly.
Potential Risks of Skipping Calibration
- Incorrect Emergency Braking: Your vehicle may brake too late—or worse, brake suddenly when there’s no obstacle.
- Lane Assist Failure: The system may fail to properly detect lane markings, increasing the risk of drifting.
- Adaptive Cruise Control Issues: Inaccurate distance readings can cause unsafe following distances.
- False Alerts or No Alerts at All: You might get constant warnings—or none when you actually need them.
- Disabled ADAS Features: Some vehicles will completely shut off systems like forward collision warning or blind spot monitoring.
Safety & Liability Concerns
Driving without proper ADAS recalibration increases your risk of accidents. In some cases, it could even create legal or insurance issues if a malfunction contributes to a crash.
Mechanic’s Warning (Real Talk)
ADAS isn’t just a convenience—it’s a critical safety system. If it’s not calibrated correctly, you’re basically driving with “blind” sensors. Always complete the calibration process after repairs to keep your vehicle safe and reliable.
Best Tools Used for ADAS Calibration
Proper ADAS calibration requires specialized equipment designed for precision, accuracy, and OEM-level diagnostics. Professional shops invest heavily in these tools to ensure every sensor and camera alignment meets factory specifications.

1. Advanced ADAS Scan Tools
These are not basic scanners—they’re high-end OBD2 diagnostic tools with ADAS functions that:
- Read and clear ADAS-related trouble codes.
- Initiate calibration procedures
- Access OEM-specific data and instructions
2. Calibration Frames & Targets
For static calibration, technicians use:
- Calibration frames/rigs (large adjustable structures)
- OEM targets and panels are placed at exact distances
These help align forward-facing cameras and radar sensors with extreme precision.
3. Laser Alignment Systems
Laser tools ensure the vehicle and calibration targets are perfectly aligned. Even slight misalignment can affect sensor accuracy and system performance.
4. Wheel Alignment Systems
Since suspension angles affect sensor positioning, a proper wheel alignment machine is often used before calibration begins.
5. OEM Software & Databases
Manufacturers provide specific calibration procedures. Shops use OEM software to follow exact steps for each vehicle model, ensuring correct ADAS recalibration.
Mechanic Insight
This isn’t a basic garage job. Without the right tools and setup, you can’t achieve the proper accuracy in ADAS sensor calibration. That’s why certified shops charge more—they’re using thousands of dollars’ worth of equipment to get it right.
FAQs
How do I know if my ADAS needs calibration?
You’ll usually notice signs like dashboard warning lights (ADAS error, collision warning unavailable), lane assist not working properly, or adaptive cruise behaving inconsistently. Calibration is also required after certain repairs—especially windshield replacement, minor accidents, wheel alignment, or sensor replacement. Even if there are no obvious symptoms, modern vehicles often store hidden fault codes that only show up with a scan tool. If your car recently had any front-end work or camera-related repair, it’s safest to assume ADAS recalibration is needed to restore proper sensor alignment and system accuracy.
Can I drive without ADAS calibration?
Yes, the car will still drive—but it’s not safe in the long term. Without proper ADAS sensor calibration, features such as automatic emergency braking, lane assist, and adaptive cruise control may produce incorrect readings or fail entirely. In some cases, the system may not warn you at all before a potential collision. While you might be able to drive short distances, it’s best to treat this as a temporary situation only. Driving without calibration increases accident risk and defeats the purpose of having advanced safety systems in your vehicle.
Does windshield replacement require ADAS calibration?
Yes—on most modern vehicles, it absolutely does. Many cars have a front-facing camera mounted on the windshield, which controls systems like lane departure warning and forward collision alert. When the windshield is replaced, even a slight shift in camera position can affect accuracy. That’s why camera recalibration is required immediately after installation. Most professional glass shops include this step, and many insurance policies cover it. Skipping calibration after a windshield replacement can lead to false alerts or system failure.
Why is ADAS calibration so expensive?
ADAS calibration costs more because it requires specialized tools, trained technicians, and precise setup conditions. Shops use expensive calibration rigs, targets, laser alignment systems, and OEM software to ensure everything is aligned perfectly. The process also takes time—especially for static and combined calibration procedures. Unlike basic repairs, this isn’t guesswork; it’s a highly technical service tied directly to safety. You’re paying for accuracy, reliability, and proper system performance, which are critical for features like collision avoidance and lane-keeping assist.
Conclusion
ADAS systems are designed to keep you safe—but only when they’re properly calibrated. Whether it’s after a windshield replacement, an accident, or suspension work, skipping calibration can pose serious safety risks and lead to system failure.
If your vehicle shows warning signs or has recently had repairs, don’t ignore it. A proper ADAS calibration service ensures your cameras and sensors are aligned exactly as the manufacturer intended—keeping your drive safe, smooth, and reliable.
