
The MAP sensor (Manifold Absolute Pressure sensor) is vital for efficient engine operation. It measures intake manifold pressure and relays this to the powertrain control module (PCM), enabling proper fuel, air, and ignition timing. Faulty or dirty MAP sensors confuse the PCM, leading to rough idle, acceleration hesitation, poor performance, and decreased fuel efficiency. In severe cases, the powertrain control module may stall or run rich due to misinterpretation of a heavy load.
Drivers often replace the MAP sensor right away, but many MAP issues can be fixed with a simple PCM reset. If the sensor is mechanically sound, clearing learned fuel trims or performing a relearn can restore function. Resetting can involve disconnecting the battery, clearing codes with an OBD2 scanner, or doing an idle/throttle relearn on newer vehicles.
Before making repairs or replacements, it’s important to diagnose the issue. Resetting a good sensor saves money, but resetting a broken one won’t solve anything—so always check before replacing parts. Understanding how the MAP sensor functions helps clarify why accurate diagnosis is critical.

What does a MAP sensor do?
The MAP sensor helps the engine manage the air-fuel mixture. Monitoring intake manifold pressure informs the PCM of engine workload. Pressing the accelerator raises manifold pressure, prompting the PCM to add fuel. Lower pressure at idle or light driving reduces fuel delivery. This feedback balances the air-fuel ratio, affecting performance, efficiency, and emissions.
The PCM doesn’t rely solely on the MAP sensor. It also compares MAP sensor readings with data from the Mass Airflow (MAF) sensor, Throttle Position Sensor (TPS), and Intake Air Temperature (IAT) sensor. Together, these sensors help the PCM determine ignition timing, injector pulse width, and engine load. If any of these signals don’t match, the PCM instantly knows something is off.
MAP sensors are vital for turbocharged engines, where boost pressure changes quickly. The sensor must respond fast and accurately so the PCM can properly manage fuel and prevent detonation or lean mixtures under boost.
When MAP data falls out of range—either too high, too low, or stuck—the engine immediately feels it. Common symptoms include rough idle, hesitation, stalling, poor fuel economy, and sluggish acceleration. Recognizing these symptoms underscores the importance of accurate MAP data, as even minor issues can significantly affect drivability. Next, let’s explore specific signs of a bad or dirty MAP sensor.
Symptoms of a Bad or Dirty MAP Sensor
A failing or dirty MAP sensor disrupts air-fuel management. The PCM depends on accurate pressure data, so incorrect readings cause immediate, noticeable issues.
1. Check Engine Light
The most common sign is the Check Engine Light, also known as the Malfunction Indicator Lamp. Diagnostic trouble codes such as P0106, P0107, or P0108 appear when the MAP sensor signal is too low, too high, or inconsistent. Freeze-frame data often shows abnormal MAP values at idle—either an unusually high vacuum or almost no vacuum signal.
2. Poor Acceleration or Hesitation
If the MAP sensor under-reports pressure, the PCM delivers too little fuel. When you hit the gas, the engine stumbles, hesitates, or feels flat because it’s running lean.
3. Rough Idle or Stalling
Incorrect MAP input disturbs the PCM’s idle calculation. If the sensor shows too much load at idle, the PCM adds excess fuel, causing surging or stalling.
4. High Fuel Consumption
A MAP sensor stuck at a high reading makes the PCM think the engine is under heavy load, triggering a rich mixture and poor fuel economy.
5. Hard Starting
On startup, the PCM uses MAP pressure to determine how much fuel to inject. Wrong readings cause either too much or too little fuel, making the engine crank longer.
6. Slow Throttle Response
Delayed MAP data means the PCM reacts slowly, resulting in sluggish throttle response and lazy acceleration.
7. Black Smoke or Rich Running
A MAP sensor reading high pressure when the vacuum is actually strong will force the engine to run rich, producing black exhaust smoke. Freeze-frame logs often show a high MAP (kPa) at idle.
Common Causes of MAP Sensor Problems
MAP sensors rarely fail completely. Most problems result from outside factors that distort readings.
1 Carbon Buildup Inside Intake Manifold
Carbon buildup at the MAP port restricts airflow, slowing sensor response and making readings lag or stick.
2 Vacuum Leaks
A cracked intake boot, leaking gasket, or loose hose reduces manifold vacuum. The MAP sensor reads this as a high load, resulting in a rich mixture.
3 Cracked or Loose MAP Sensor Hose
On engines that use a vacuum hose to feed the MAP sensor, any crack or loose fit causes false low-vacuum readings.
4 Electrical Connector Corrosion
Moisture in the connector raises resistance, causing voltage drops and MAP signal spikes.
5 Damaged Wiring
Frayed wires, rodent damage, or melted insulation can short the signal or reference wire, causing out-of-range readings.
6 Faulty PCM Readings
In rare cases, the PCM misinterprets sensor signals due to software glitches or failures. These issues cause the PCM to misjudge engine load, leading to drivability problems, high fuel use, or incorrect ignition timing.
Can You Reset a MAP Sensor?
In many cases, you can reset a MAP sensor to restore engine performance without replacing it. The sensor lacks a ‘reset button.’ Instead, the PCM stores adaptive data—fuel trims and load values—based on MAP readings. If the sensor has produced bad data due to issues such as carbon buildup, low voltage, or vacuum leaks, the PCM may continue using those incorrect values even after repair or cleaning.
Resetting removes the PCM’s stored adjustments, allowing it to relearn correct MAP readings. This method works best if the MAP sensor is dirty but still functional. Resetting can also clear trouble codes like P0106 and P0107. Since it is cheaper than replacement, try resetting as the first step. The three main reset methods are:
- A battery disconnect to hard-reset the PCM
- Use a diagnostic scanner to clear codes and reset fuel trims.
- A relearn procedure, used on newer vehicles, to recalibrate the idle and load
Keep in mind, though, that resetting will not fix a failed MAP sensor. Always diagnose the sensor first, then reset the PCM if the MAP sensor is still good, and only replace it when necessary.
Tools You May Need
Resetting or servicing a MAP sensor is simple with the right tools. At a minimum, you need a 10mm wrench to disconnect the battery. An OBD2 scanner is helpful. Use a MAP-safe cleaner when cleaning the sensor. Wear gloves, use towels, and safety glasses. For deeper checks, use a multimeter to test the 5V reference, ground, and signal wires. With these tools, you can professionally diagnose, reset, and clean most MAP sensors. Resetting a MAP sensor means resetting the PCM so it can learn correct manifold pressure readings. Modern vehicles use MAP data for load, timing, and fuel calculations. If the sensor is dirty or inconsistent, a reset can restore normal function if the sensor isn’t damaged. Here are the three main reset methods commonly used.
Method 1: Battery Disconnect Reset (Simple Hard Reset)
The most common DIY method is disconnecting the battery to clear the PCM’s adaptive values, including fuel trims, idle strategy, and MAP memory.
Step-by-Step Instructions
Step 1 — Turn off the ignition:
Make sure the key is out, and accessories are off.
Step 2 — Disconnect the negative battery terminal:
Use a 10mm wrench. Always remove the negative cable first to avoid sparks.
Step 3 — Wait 10–15 minutes:
This drains capacitors inside the PCM and clears stored data. Some technicians touch both battery cables together (not while connected to the battery) to speed up discharge—this step is optional but effective.
Step 4 — Reconnect the battery:
Attach the negative terminal back securely.
Step 5 — Start the engine and let it idle:
Idle for 2–3 minutes with no A/C or accessories. The PCM will relearn idle airflow and MAP data.
Why this works:
This clears old fuel trims based on MAP data, which could otherwise cause the engine to run too rich or too lean after cleaning or repairing the sensor.
Method 2: Reset Using an OBD2 Scanner (Most Accurate Method)
Using a scanner is the professional method and gives the best results—especially for late-model vehicles.
Step-by-Step Instructions
Step 1 — Plug in the OBD2 scanner:
Turn the key to ON (engine off).
Step 2 — Go to the Powertrain Control Module (PCM): Select diagnostics, then choose “Powertrain” or “PCM.
Step 3 — Clear MAP-related trouble codes:
Look for P0106, P0107, P0108, or correlation codes. Clearing them forces the PCM to reset MAP-related adaptations.
Step 4 — Erase fuel trims and adaptive memory:
Some scanners have a dedicated “Fuel Trim Reset” or “Reset Learned Values” option. This is the fastest way to reset MAP sensor data.
Step 5 — Start the engine and check live data:
Verify MAP kPa readings:
- Idle MAP: 28–40 kPa (varies by engine)
- Light throttle: 40–80 kPa
- WOT (wide open throttle): 95–101 kPa (near atmospheric)
If numbers are stable and responding quickly, the reset worked.
Why this works:
This forces the PCM to start fresh with its fueling and timing strategy, wiping out any faulty calculations caused by bad MAP readings.
Method 3: MAP Sensor Relearn Procedure (For Modern Cars)
Cars built after around 2010 often require a formal relearn after a reset. This helps the PCM rebuild load, idle, and throttle calculations using fresh MAP readings.
Typical Relearn Steps
- Turn the key ON for 5 seconds (do not start).
- Turn the key OFF for 10 seconds.
- Start the engine without touching the throttle.
- Let the engine idle for 3–5 minutes until the RPM stabilizes.
- Turn on the A/C or headlights for 1 minute to allow the PCM to learn load changes.
- Drive normally for 10–15 minutes, varying throttle position.
- Perform 2–3 full-throttle accelerations (if safe) to teach MAP readings at wide-open throttle.
Why this is important
Modern engines use what’s called “adaptive learning.” The PCM won’t fully trust new sensor data until it’s observed it in a variety of real driving conditions. The relearn process ensures the PCM receives accurate MAP readings at idle, while cruising, and at wide-open throttle.
Which Reset Method Should You Use?
- Battery reset – Good for simple fixes after cleaning a dirty MAP sensor.
- Scanner reset – Best overall method; fastest and most accurate.
- Relearn procedure – Mandatory for many modern vehicles after any MAP repair.
For best results, professional mechanics often combine scanner reset + relearn to give the PCM the cleanest possible starting point.
How to Clean the MAP Sensor Before Reset
Before you reset the PCM, it’s wise to clean the MAP sensor, especially if your engine has a lot of miles or you notice oil or dirt in the intake. A dirty sensor can send slow or incorrect pressure readings, leading to hesitation, a rough idle, or poor fuel economy. Cleaning the MAP sensor ensures that, when you reset the PCM, it will relearn accurate values from a clean sensor.
Step-by-Step Cleaning Process
- Disconnect the battery. For safety, especially on turbocharged engines, where the MAP sensor is near hot components.
- Locate and remove the MAP sensor. Most sensors are mounted on the intake manifold with one or two screws. Avoid twisting or prying hard, as the plastic housing can crack.
- Spray the sensor with MAP-safe cleaner. Use only electronics or MAP/MAF-safe cleaners. Do NOT use carb cleaner, brake cleaner, or WD-40—these chemicals can damage the sensor membrane.
- Clean the sensor opening and the surrounding port. If the intake manifold port is clogged with carbon, gently clean it with a straw brush or microfiber swab.
- Let the sensor air-dry completely. Never wipe the tip with a cloth—it can damage the sensitive diaphragm.
- Reinstall the sensor and evenly tighten the screws.
Why Cleaning Helps
A clean MAP sensor reacts more quickly to pressure changes, giving the PCM the accurate data it needs for load and vacuum. Once you clean the sensor and reset the PCM, the computer can relearn using fresh, accurate data. This often leads to a smoother idle, better throttle response, and improved gas mileage.
9. How to Test a MAP Sensor Before Reset
Testing the MAP sensor ensures you don’t waste time resetting a dead or faulty sensor. These checks confirm whether the sensor is dirty, misreading, or completely failed.
1 Visual Inspection
Check for oil contamination, carbon buildup, or moisture inside the sensor port—any of these can slow down the sensor’s response and cause a delayed throttle reaction.
2 Wiring & Connector Check
Examine the connector for corrosion (green powdery residue), loose terminals, or broken locking tabs. Damaged wiring often causes intermittent MAP spikes seen in freeze-frame data.
3 Vacuum Line Test
On engines with a vacuum hose feeding the MAP sensor, check the hose for cracks, soft spots, or loose fittings. Any leak causes false low-vacuum readings, leading the PCM to believe the engine is under load.
4 Multimeter Voltage Test
Set the multimeter to DC voltage and check:
- 5V reference wire — Should read ~4.8–5.0 volts.
- Ground wire — Should show near 0 volts.
- Signal wire — Typically 1–2 volts at idle, rising toward 4.5 volts at wide-open throttle.
If the signal stays stuck or fails to respond to throttle input, the sensor is faulty.
5 OBD2 Live Data Check
This is the most accurate test. Check MAP readings in kPa or inHg:
- Idle: ~28–40 kPa (around -17 to -21 inHg vacuum)
- Snap throttle: reading should instantly spike
- WOT: 95–101 kPa (atmospheric pressure)
If the MAP sensor reacts slowly or stays stuck at a single value, the PCM cannot calculate load correctly, and the sensor should be replaced rather than reset.
Common OBD2 Codes Related to MAP Sensor
When the MAP sensor sends inaccurate readings—or when the PCM detects values that don’t match engine conditions—it will trigger specific OBD2 codes. Understanding these codes helps diagnose whether the sensor needs cleaning, resetting, or replacement.
| P0106 | MAP Sensor Range/Performance | Dirty sensor, vacuum leak | Clean MAP, reset PCM |
| P0107 | MAP Circuit Low Input | Short to ground, bad wiring | Repair wiring, reset |
| P0108 | MAP Circuit High Input | Vacuum leak, stuck sensor | Fix leak or replace sensor |
| P0068 | MAP/Throttle Correlation | Intake leak, carbon buildup | Clean throttle body & MAP |
| P0299 | Turbo Underboost (Turbo cars) | Faulty MAP/Boost sensor | Inspect turbo system |
| P2227 | Barometric Pressure Sensor Fault | Internal sensor failure | Replace sensor |
What These Codes Mean Mechanically
When MAP readings fall outside the normal range, the PCM enters backup mode. This can cause the engine to lose power, run too rich or too lean, and drive poorly. Diagnostic data often shows strange MAP values at idle, such as unusually high or low pressure, which may suggest a vacuum leak or a stuck sensor.
Why a Reset Helps
If the sensor is cleaned or repaired, clearing codes and resetting adaptive memory allows the PCM to relearn accurate MAP values and restore normal fuel trims.
What Happens After a MAP Sensor Reset?
After you reset the MAP sensor or clear the PCM’s memory, the engine might act a little differently for the first few minutes. This is totally normal—the PCM needs a bit of time to rebuild its fuel trims, adjust idle speed, and relearn throttle settings based on the new MAP data.
You may notice:
- Slightly high idle for 1–3 minutes.
- Rough or unstable idle until trims settle
- Improved throttle response as soon as the PCM relearns the load
- Better fuel economy after 20–30 miles of mixed driving
- Smoother acceleration once the PCM has seen idle, cruise, and WOT conditions
On turbocharged engines, boost response may feel more consistent because the PCM now has accurate MAP/boost pressure feedback. If the engine still runs poorly after a reset, the issue is likely mechanical—such as a vacuum leak, wiring problem, or a failed sensor.
A reset won’t fix every issue, but it’s an important step to take after cleaning, servicing, or replacing the MAP sensor.
When Reset Will NOT Fix Your Issue
A reset only helps when the MAP sensor is dirty or clogged, or when it’s feeding inaccurate data due to carbon buildup or bad fuel trims. If the sensor is physically damaged or the problem is elsewhere, no amount of resetting will solve it.
Here are situations where a reset will not fix the problem:
- Broken or Dead MAP Sensor. If the sensor’s diaphragm is ruptured or the internal electronics fail, the signal voltage will stay stuck at 0V or 4.5V.
- Vacuum Leaks. A cracked intake hose, leaking gasket, or loose clamp will cause false high MAP readings even after a reset.
- Wiring Issues. Damaged wiring harnesses, shorted circuits, or corroded terminals cause erratic signals that can’t be corrected by resetting.
- Severe Carbon Blockage. If the manifold port is completely clogged, the sensor won’t accurately detect pressure changes.
- PCM Failure (rare). A faulty computer can misinterpret signals, repeatedly triggering MAP-related codes.
If symptoms return immediately after a reset, the sensor must be tested, cleaned thoroughly, or replaced. Proper diagnosis ensures you don’t waste time or money guessing.
Should You Replace or Reset?
You don’t need to replace the MAP sensor every time your engine runs rough or the check engine light turns on. Most MAP sensor problems are caused by factors such as carbon buildup, oil contamination, vacuum leaks, or incorrect fuel trims—not by sensor failure itself. That’s why good mechanics always test and reset the MAP sensor before suggesting a replacement.
When a Reset Is Enough
A reset is usually all you need when:
- The sensor responds to pressure changes, but readings were off due to the buildup.
- MAP values improve after cleaning
- Trouble codes like P0106 or P0108 don’t return after clearing.
- The engine runs smoother after a hard battery reset or scanner reset.
When You Should Replace the MAP Sensor
Replacement becomes necessary when:
- The signal stays stuck at 0V or 4.5V
- The reading does not change during snap throttle tests.
- The internal diaphragm is damaged.
- Wiring and vacuum lines are confirmed good.
- The same MAP code is returned immediately after cleaning and resetting.
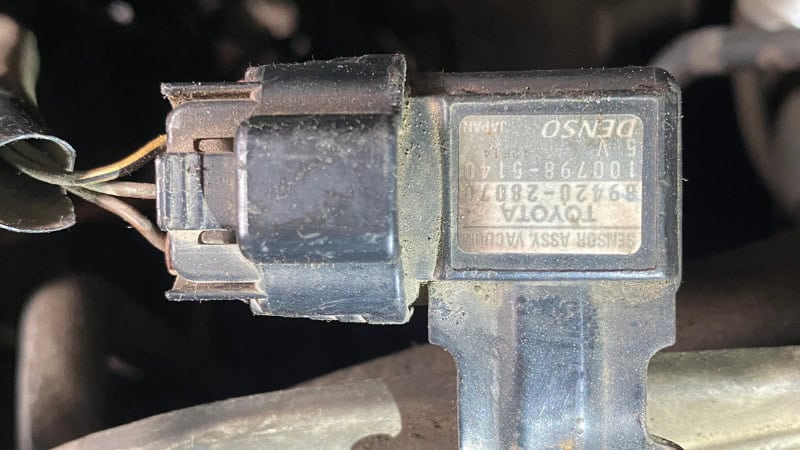
For long-term reliability, choose OEM or high-quality brands like Denso, Bosch, AC Delco, Delphi, or Motorcraft. Cheap aftermarket sensors often fail early and give unreliable readings.
MAP Sensor Maintenance Tips
Keeping the MAP sensor healthy is simple and helps prevent unnecessary resets or replacements. Start by regularly inspecting the intake manifold area—especially on engines known for oil vapors and PCV issues. Cleaning the MAP sensor every 20,000–30,000 miles is a smart habit, particularly on vehicles with direct injection, where carbon buildup occurs faster.
Make sure the air filter is clean, and avoid running cheap aftermarket cone filters that let dirt bypass the intake system. Keep the throttle body clean, because airflow restrictions can cause MAP and TPS correlation codes. Always fix vacuum leaks quickly; even a small crack in a hose can throw off manifold pressure readings and hurt fuel economy.
With basic maintenance, a MAP sensor easily lasts over 100,000 miles without issues.
Final Thoughts
Resetting a MAP sensor is a simple but highly effective way to fix rough idling, hesitation, poor acceleration, and bad gas mileage—without throwing money at unnecessary parts. When the MAP sensor is clean and working properly, it provides the PCM with the load data it needs to manage fuel, timing, and boost (on turbo engines). Before spending money on a new sensor, always clean it, check for vacuum leaks, inspect the wiring, and do a proper reset with a battery disconnect or an OBD2 scanner.
In many cases, simply replacing the MAP sensor and resetting the PCM can restore your engine to smooth, reliable performance. With regular maintenance, you can avoid MAP-related problems and keep your vehicle running well for years.