
Failed your emissions test and not sure what went wrong? You’re definitely not alone. Every year, thousands of drivers head into inspection thinking their vehicle is running perfectly—only to find out it doesn’t meet emissions standards. The frustrating part? In many cases, the car feels completely fine on the road. No rough idle, no strange noises… just a failed test and a lot of questions.
Vehicle emissions tests ensure your engine runs cleanly and limits harmful gases. Small issues—like a loose gas cap, a dirty sensor, or a recently reset battery—can cause failure instantly.
To begin, let’s clarify how the emissions test actually works, why so many cars fail, and what you can do—step by step—to pass quickly and efficiently without unnecessary hassle.
What Is a Vehicle Emissions Test?
A vehicle emissions test is a quick inspection that measures the amount of pollution your car emits. In simple terms, it ensures your engine runs cleanly and doesn’t emit excessive amounts of harmful gases, such as carbon monoxide (CO), hydrocarbons (HC), or nitrogen oxides (NOx). These tests are required in many states to maintain air quality and ensure vehicles remain environmentally compliant.
Modern emissions testing focuses more on your car’s computer reports than actual exhaust output. Most vehicles built after 1996 use OBD2 (On-Board Diagnostics) to continuously monitor engine performance and emissions components.
Types of Emissions Tests
OBD2 Scan (Most Common)
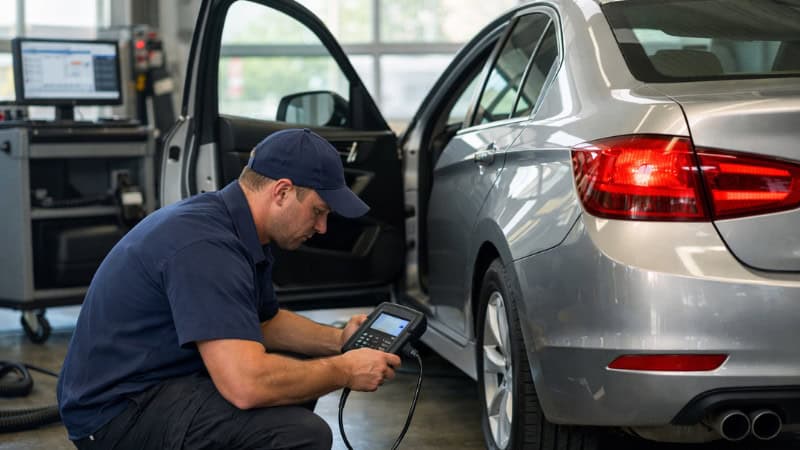
This is the fastest and most common method. The inspector plugs a scanner into your car’s OBD2 port and checks for:
- Active trouble codes (like P0420 or P0171)
- Readiness monitors (systems that confirm everything is working properly)
- Check engine light status.
If your check engine light is on or monitors aren’t ready, you’ll likely fail immediately.
Tailpipe (Exhaust) Test
For older cars, this test measures exhaust gases to check whether emissions are within limits.
Visual Inspection
In some cases, inspectors will also look under the hood or under the car to confirm that key emissions components are present and unaltered. This includes:
- Catalytic converter
- Oxygen sensors
- EVAP system components
Now that you know the main types of emissions tests, it’s important to understand what inspectors are really checking for during your visit.
At the end of the day, the test is focused on one thing:
Is your engine running efficiently and cleanly?
That means:
- No warning lights on the dashboard
- All emissions systems work as intended.
- No excessive pollutants are being released.
If any of these systems are out of balance—even slightly—your vehicle can fail the test. That’s why understanding the common failure points is the key to passing on your first try.
Why Vehicles Fail Emissions Tests (Most Common Causes)
Understanding why vehicles fail emissions tests is the first step toward quickly fixing the problem and avoiding unnecessary repairs. As a mechanic, I find that most failures come down to a few common issues—many of which are easier to fix than drivers might assume.
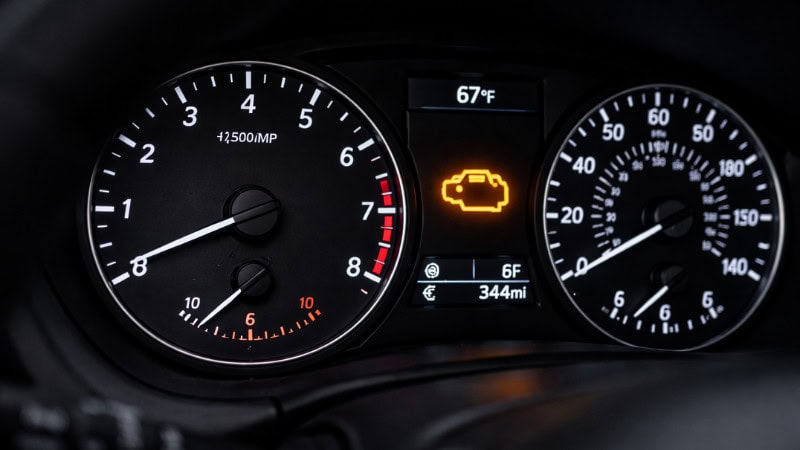
Check Engine Light (CEL) Is On
If your check engine light is on, your vehicle will automatically fail the emissions test—no exceptions.
Even if the car feels like it’s running perfectly, the system has detected a fault that affects emissions. Inspectors rely on your vehicle’s onboard diagnostics (OBD2), and any active code is a red flag.
Common trouble codes include:
- P0420 – Catalytic converter efficiency below threshold
- P0171 – System too lean (too much air, not enough fuel)
- P0300 – Random or multiple engine misfires
Important: Simply clearing the code won’t help. You must fix the underlying issue and complete a drive cycle.
Faulty Oxygen (O2) Sensor
The oxygen sensor helps your engine use the right air-fuel mix by checking exhaust oxygen.
When the O2 sensor fails:
- The engine may run too rich (too much fuel) or too lean (too much air)
- Combustion becomes inefficient.
- Emission levels increase significantly.
A bad O2 sensor is one of the most common reasons for emissions failure—and one of the more affordable fixes.
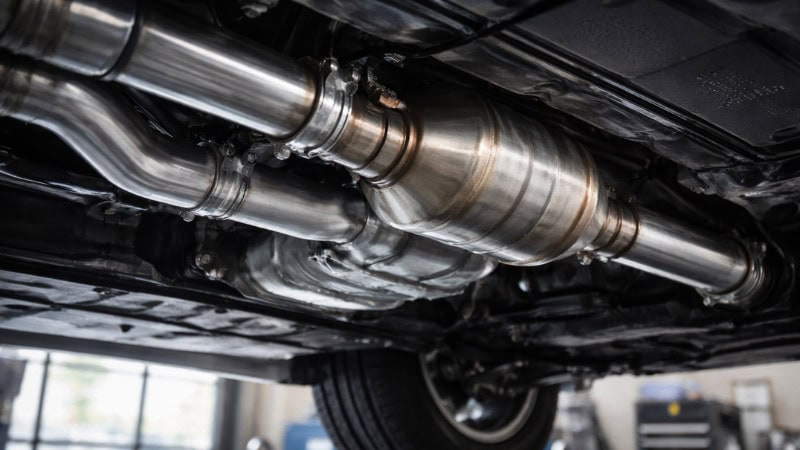
Bad Catalytic Converter
The catalytic converter converts harmful gases into less harmful ones before they exit the exhaust.
When it fails:
- Harmful gases are no longer properly filtered.
- Emissions spike immediately
- The vehicle will fail the test without question.
This is often the most expensive repair, especially on modern vehicles.
EVAP System Leaks
The EVAP system prevents fuel vapors from entering the air.
Common causes of EVAP failure include:
- Loose or damaged gas cap
- Cracked or disconnected vacuum hoses
- Faulty purge valve or charcoal canister
Even a small leak can trigger a fault code and cause a failed test. The good news? Many EVAP issues are quick and inexpensive to fix.
Dirty or Faulty MAF Sensor
The MAF sensor measures how much air enters the engine to adjust the fuel mixture.
If the MAF sensor is dirty or faulty:
- Airflow readings become inaccurate.
- The air-fuel mixture becomes unbalanced.
- Emissions increase due to poor combustion.
In many cases, simply cleaning the MAF sensor can restore proper performance.
Engine Misfires or Poor Combustion
A misfire occurs when fuel in one or more cylinders doesn’t burn properly.
Common causes include:
- Worn spark plugs
- Faulty ignition coils
- Fuel delivery issues
When misfires happen:
- Unburned fuel enters the exhaust system.
- Emissions rise sharply
- The catalytic converter can be damaged over time.
Misfires should always be fixed immediately—not just for emissions, but to protect your engine.
Incomplete Drive Cycle (Not Ready Monitors)
After clearing codes or disconnecting the battery, your vehicle’s system resets. This means emissions monitors show as “Not Ready.”
What this means:
- The system hasn’t completed its self-checks
- The inspection station can’t verify emissions performance.
- The vehicle may fail even with no active problems.
To fix this, you need to complete a full drive cycle (usually 50–100 miles with mixed driving conditions).
Mechanic Insight
From a mechanic’s perspective, most emissions test failures aren’t caused by major engine damage—they’re usually the result of small, often ignored issues. Addressing these promptly not only helps you pass the test but also keeps your engine running efficiently and saves money in the long run.
How to Pass a Vehicle Emissions Test (Step-by-Step)
Passing an emissions test isn’t about luck—it’s about preparation. Follow this step-by-step process like a pro mechanic, and you’ll dramatically increase your chances of passing on the first try.
Step 1 – Check for Trouble Codes (OBD2 Scan)
Before doing anything else, scan your vehicle for diagnostic trouble codes.
- Use an OBD2 scanner or visit an auto parts store for a free scan.
- Check for active and pending codes.
- Write down any codes you find
If codes are present, your car is already telling you what’s wrong. Fix those issues first before going to the test.
Step 2 – Fix the Check Engine Light First
Never attempt an emissions test with the check engine light on.
- A lit CEL = automatic failure
- Even small issues can trigger it.
- Avoid just clearing the code—repair the actual problem.
Clearing codes without fixing the issue resets the system and creates new problems, like “not ready” monitors.
Step 3 – Complete a Full Drive Cycle
After repairs or a battery reset, your vehicle needs time to verify that everything is working properly.
Drive 50–100 miles under mixed conditions.
Include:
- Highway driving (steady speeds)
- City driving (stop-and-go traffic)
Allow the engine to cool and restart between trips.
This process sets your readiness monitors to “READY,” which is required to pass the test.
Step 4 – Warm Up the Engine Properly
Always take your test with a fully warmed-up engine.
- Drive at least 15–20 minutes before arriving.
- A warm engine burns fuel more efficiently.
- The catalytic converter works best at high temperatures.
A cold engine can increase emissions and lead to failure.
Step 5 – Use High-Quality Fuel or Additive
Fuel quality directly affects combustion and emissions.
- Fill up with high-quality gasoline before the test.
- Consider using a fuel system cleaner.
- Helps clean injectors and improve combustion efficiency
This can reduce emissions, especially in vehicles with minor buildup.
Step 6 – Check and Tighten Gas Cap
This is one of the simplest fixes—and one of the most overlooked.
- Make sure the gas cap is tight (listen for clicks)
- Inspect for cracks or worn seals.
- Replace if necessary (low-cost fix)
A loose gas cap can trigger EVAP system codes and cause a failure.
Step 7 – Inspect Air Filter & Intake System
Clean airflow is essential for proper combustion.
- Replace a dirty or clogged air filter.
- Check intake hoses for leaks or disconnections.
Better airflow helps maintain the correct air-fuel ratio and reduces emissions.
Step 8 – Change Engine Oil (If Dirty)
Old or contaminated oil can negatively affect engine performance.
- Dirty oil increases internal engine friction.
- Can lead to higher emissions output
- Fresh oil improves engine efficiency.
This is especially important for older or high-mileage vehicles.
Pro Mechanic Tip
Most people fail emissions tests because they rush the process.
They clear codes at the last minute, skip the drive cycle, or ignore small issues.
Take the time to prepare properly, and you’ll avoid a failed test, extra fees, and unnecessary stress.

Quick Fixes That Can Help You Pass Emissions (Mechanic Tips)
If you’re short on time or trying to pass the test without major repairs, these quick fixes can make a real difference. From a mechanic’s perspective, small adjustments often improve emissions enough to help your vehicle pass.
Drive the Car Before the Test
Never take your car straight to the test without driving it first.
- Drive for at least 15–20 minutes.
- Keep RPM steady for a while (highway driving helps)
This fully warms up the engine and catalytic converter, improving emission efficiency.
Inflate Tires to Proper Pressure
Low tire pressure places extra strain on the engine.
- Check and inflate all tires to the recommended PSI.
- Reduces engine strain and fuel consumption
Less engine load = cleaner combustion.
Avoid Testing Right After Resetting the Battery
If you recently disconnected the battery or cleared codes:
- Your readiness monitors will reset
- The system will show “Not Ready.”
- You may fail even with no real issues.
Always complete a drive cycle before going to the test.
Use a Fuel System Cleaner
A good-quality fuel additive can help clean internal components.
- Removes carbon deposits from injectors
- Improves fuel spray and combustion
- Can slightly reduce emissions
Helpful for minor issues—not a fix for major problems.
Replace Cheap, Worn-Out Parts
Small worn parts can affect emissions more than you think.
- Old spark plugs → poor combustion.
- Dirty air filter → restricted airflow
- Weak ignition components → misfires
Replacing these is inexpensive and often improves results quickly.
Fix Minor Vacuum Leaks
Small air leaks can throw off your engine’s air-fuel ratio.
- Check hoses for cracks or loose connections.
- Listen for hissing sounds under the hood.
Even a tiny leak can cause emission issues.
Don’t Go for the Test on a Nearly Empty Tank
Fuel level can affect EVAP system testing.
- Keep your fuel tank between 1/4 and 3/4 full.
- Being too full or too empty can prevent proper system checks.
This helps your EVAP monitor complete successfully.
Real Mechanic Insight
Here’s the truth:
Most cars don’t fail emissions because of one major issue—they fail due to a combination of small problems.
Fix the basics first, and you’ll often pass without spending much money.
How Much Does It Cost to Fix Emission Problems?
One of the biggest concerns after a failed emissions test is cost. The good news? Not every failure means an expensive repair. In many cases, the issue is something simple and affordable—especially if you catch it early.
Here’s a realistic breakdown from a mechanic’s perspective.
Common Emission Repairs & Costs
| Gas Cap Replacement | $10 – $30 |
| Air Filter Replacement | $20 – $60 |
| MAF Sensor Cleaning | $10 – $50 |
| Oxygen (O2) Sensor | $100 – $300 |
| Spark Plugs Replacement | $100 – $250 |
| EVAP System Repair | $150 – $600 |
| Catalytic Converter | $800 – $2500+ |
Cheap Fixes vs Expensive Repairs
Low-Cost Fixes (Most Common)
These are quick and budget-friendly:
- Tightening or replacing a gas cap
- Cleaning the MAF sensor
- Replacing air filters or spark plugs
Many drivers pass emissions after fixing just one of these.
Mid-Range Repairs
These require a bit more investment:
- Replacing O2 sensors
- Fixing EVAP leaks
- Addressing minor engine performance issues
Still manageable, especially compared to major repairs.
High-Cost Repairs
These are less common but more serious:
- Catalytic converter replacement
- Major engine misfire repairs
- ECU-related issues
If repair costs are too high, some drivers consider whether it’s worth fixing based on its value.
DIY vs Mechanic Cost
- DIY Repairs: You can save a lot on labor if you have basic tools and knowledge
- Professional Repair: Higher cost, but ensures accurate diagnosis and long-term fix
Misdiagnosing the issue can cost more in the long run, so be careful.
Mechanic Insight
Don’t panic after a failed emissions test.
In many cases, the problem is small, fixable, and affordable.
Start with the basics, diagnose properly, and only move to expensive repairs if absolutely necessary.
Can You Pass Emissions with the Check Engine Light On?
Short answer: No—you cannot pass an emissions test with the check engine light (CEL) on.
From a mechanic’s perspective, this is one of the most misunderstood parts of emissions testing. Many drivers think, “The car runs fine, so it should pass.” But the system doesn’t work that way.
Why the Check Engine Light Causes an Automatic Fail
When the check engine light is on, it means your vehicle’s onboard computer (OBD2 system) has detected a fault related to emissions or engine performance.
During the test:
- The inspector scans your vehicle’s computer.
- If any active trouble code is present → instant fail
- The system assumes your vehicle is not in compliance with emissions standards.
Even a minor issue, such as a small EVAP leak, can trigger a fail.
What If You Clear the Codes Before the Test?
This is where many people make a mistake.
- Clearing codes resets the system.
- All readiness monitors switch to “Not Ready.”
- The inspection station cannot verify emissions performance.
Result: You still fail—just for a different reason.
What Are Readiness Monitors?
Readiness monitors are self-check systems inside your car that confirm key components are working properly.
Examples include:
- Catalytic converter monitor
- Oxygen sensor monitor
- EVAP system monitor
If these monitors are not complete:
- The system shows “Not Ready.”
- The vehicle may fail the test automatically.
This usually happens after:
- Disconnecting the battery
- Clearing codes
- Recent repairs
What You Should Do Instead
To pass emissions successfully:
- Diagnose the problem properly using an OBD2 scanner.
- Fix the root cause (don’t just clear the code)
- Drive the car through a full drive cycle (50–100 miles)
Confirm:
- No check engine light
- All monitors show “Ready.”
Mechanic Insight
Clearing the check engine light might seem like a quick fix—but it actually makes things worse.
The only real way to pass an emissions test is to repair the issue and let the system verify it’s fixed.
What Happens If You Fail an Emissions Test?
Failing an emissions test isn’t the end of the road—but you do need to take the right steps quickly. What happens next depends on your state, but the process is generally similar across the U.S.
You’ll Receive a Failure Report
After the test, you’ll get a report showing:
- The reason for failure
- Any trouble codes detected
- Emissions readings (for older vehicles)
This report is your roadmap—it tells you exactly what needs to be fixed.
You’ll Need to Repair the Problem
Before retesting, the issue must be resolved.
- Fix the fault causing the failure.
- Address all related trouble codes.
- Don’t ignore “small” problems—they still cause failure.
In many cases, fixing a single main issue will resolve multiple symptoms.
Retest Is Required
Once repairs are complete:
- You must return for a retest.
- Some states offer free or discounted retests within a certain period.
Always confirm your local retest policy to save money.
You May Have a Deadline
Most states give you a limited time to pass emissions.
- Typically 7 to 30 days
- You must fix the issue and pass within this period.
Missing the deadline can create registration problems.
Registration May Be Blocked
If your vehicle doesn’t pass emissions:
- You may not be able to renew your registration.
- Your vehicle could become illegal to drive in that state.
This is why it’s important to act fast after a failure.
Possible Penalties or Fees
Depending on your location:
- Late fees may apply
- Additional inspection costs may be required.
- Some areas offer repair assistance programs.
Costs can add up if the issue is ignored.
Mechanic Insight
Failing an emissions test is common—and usually fixable.
Don’t panic. Focus on:
- Reading the report carefully
- Fixing the root cause
- Completing a proper drive cycle before retesting
Most drivers pass on the second attempt once the real issue is addressed.
How to Get a “Not Ready” Monitor to Pass
One of the most frustrating reasons for failing an emissions test is seeing “Not Ready” on your readiness monitors—even when your car has no check engine light and seems to run perfectly.
From a mechanic’s point of view, this is very common after clearing codes, disconnecting the battery, or performing repairs.
What Does “Not Ready” Mean?
Your vehicle’s computer runs self-checks on key emissions systems. These are called readiness monitors.
Common monitors include:
- Catalytic converter
- Oxygen sensors
- EVAP system
- EGR system
When a monitor shows “Not Ready”, it means:
- The system hasn’t completed its self-test
- The inspection station can’t verify emissions performance.
Result: You may fail the test—even with no active issues.
What Causes Monitors to Reset?
Readiness monitors reset when:
- You clear the trouble codes.
- The battery is disconnected.
- The ECU is reset after repairs.
After this, the car needs time and proper driving conditions to relearn everything.
How to Complete a Drive Cycle (Step-by-Step)
To get all monitors to “Ready,” follow a proper drive cycle. While exact steps vary by vehicle, this general method works for most cars:
1. Cold Start
- Start the engine after it has been off for several hours.
- Let it idle for 2–3 minutes.
- Avoid pressing the accelerator.
2. Steady City Driving
- Drive at low speeds (20–40 mph)
- Include stop-and-go traffic
- Duration: 5–10 minutes
3. Highway Driving
- Maintain a steady speed (50–65 mph)
- Avoid sudden acceleration or braking.
- Duration: 10–15 minutes
4. Deceleration Without Braking
- Slowly reduce speed without heavy braking.
- Let the engine coast down naturally.
5. Repeat Driving Cycles
- Mix city and highway driving.
- Total driving distance: 50–100 miles
Fuel Level Matters
For EVAP monitor readiness, keep the fuel level between 1/4 and 3/4 tank.
Being too full or too empty can prevent the EVAP system from completing its test.
Important Tips
- Don’t clear codes again during this process.
- Avoid aggressive driving
- Give the car time—some monitors take longer than others.
If one monitor is still “Not Ready,” keep driving normally for a few more days.
Mechanic Insight
“Not Ready” doesn’t mean something is broken—it just means your car hasn’t finished checking itself yet.
Patience is key. Complete the drive cycle properly, and your monitors will switch to “Ready,” allowing you to pass the emissions test.
Best Tools to Diagnose Emission Problems (DIY Guide)
If you want to pass an emissions test without wasting money on guesswork, having the right tools makes a huge difference. Even as a beginner, a few basic diagnostic tools can help you identify problems early and fix them correctly.
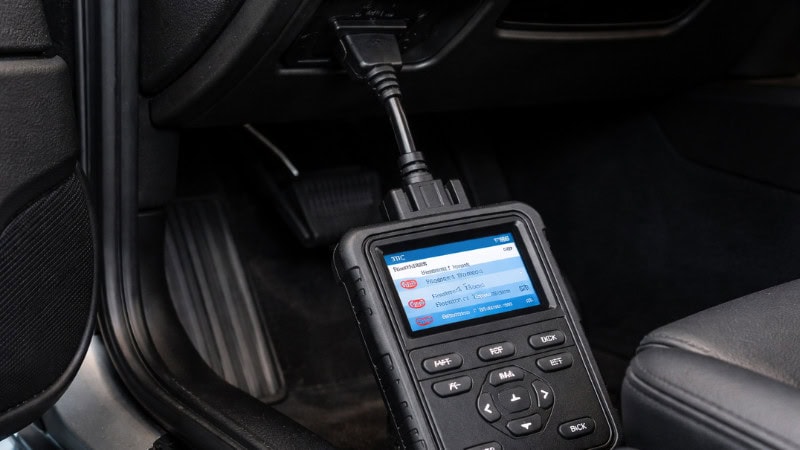
OBD2 Scanner (Must-Have Tool)
This is the most important tool for emissions diagnosis.
- Reads trouble codes (DTCs)
- Shows readiness monitor status
- Can clear codes after repairs
A basic scanner is enough for most drivers, but advanced models provide live data (such as fuel trims and O2 sensor readings).
Fuel Trim & Live Data Monitoring Tools
More advanced scanners allow you to see how your engine is running in real time.
- Short-term and long-term fuel trims
- O2 sensor activity
- Engine load and airflow
Helps you detect issues like rich/lean conditions before they trigger a code.
Smoke Machine (For EVAP Leak Detection)
EVAP leaks are one of the most common emissions failures—and sometimes hard to find.
- Injects smoke into the system
- Reveals leaks in hoses, valves, or connections
This tool is often used by professionals, but DIY versions are available.
Multimeter (Electrical Testing Tool)
A multimeter helps test electrical components related to emissions.
- Check voltage and resistance.
- Diagnose faulty sensors or wiring.
- Test the battery and charging system.
Useful for confirming whether a sensor is actually bad before replacing it.
MAF Sensor Cleaner (Simple but Effective)
Not exactly a diagnostic tool—but extremely useful.
- Cleans dirt and oil buildup on the MAF sensor
- Restores accurate airflow readings
- Improves fuel efficiency and emissions
One of the cheapest fixes that can solve real problems.
Basic Hand Tools
Sometimes the issue is mechanical, not electronic.
- Screwdrivers, sockets, pliers
- Needed for replacing sensors, spark plugs, or air filters
Simple tools can save you labor costs on easy repairs.
Mechanic Insight
You don’t need a full professional setup to diagnose emissions problems.
- Start with an OBD2 scanner—that alone can solve 80% of emission-related issues.
- Then move to advanced tools only if needed.
Vehicles That Commonly Struggle With Emissions
Not all vehicles are equal when it comes to passing emissions tests. From a mechanic’s experience, certain types of cars are far more likely to fail—usually due to age, wear, or maintenance history.
Understanding this can help you prepare better and avoid surprises.
Older Vehicles (10+ Years Old)
As vehicles age, emissions components naturally wear out.
Common issues:
- Worn catalytic converters
- Aging oxygen sensors
- Vacuum leaks from brittle hoses
Older cars often require more frequent maintenance to stay within emission limits.
High-Mileage Vehicles
Mileage plays a big role in emissions performance.
- Engines with 100,000+ miles tend to have more wear.
- Carbon buildup affects combustion efficiency.
- Sensors may become slow or inaccurate.
High-mileage vehicles are more prone to failing due to gradual performance decline.
Poorly Maintained Vehicles
Lack of regular maintenance is a major cause of emissions failure.
Common neglect areas:
- Dirty air filters
- Old spark plugs
- Delayed oil changes
Even a well-built car will fail emissions if basic maintenance is ignored.
Vehicles with Recent Repairs or Battery Reset
This one surprises many drivers.
- After repairs or battery disconnection
- Readiness monitors reset to “Not Ready.”
- The car hasn’t completed a drive cycle.
Even with no real issues, the vehicle can still fail.
Cars with Frequent Short Trips
Driving habits matter more than you think.
- Short trips don’t fully warm up the engine.
- The catalytic converter isn’t reaching optimal temperature.
- Carbon buildup increases over time.
These vehicles often fail due to inefficient combustion.
Modified or Tampered Vehicles
Any modification that affects emissions can lead to failure.
Examples:
- Removed catalytic converter
- Aftermarket exhaust systems
- Engine tuning that alters the fuel mixture
Most states have strict rules—modifications can cause automatic failure.
Mechanic Insight
It’s not just about the car—it’s about how it’s maintained and driven.
Even older or high-mileage vehicles can pass emissions easily if:
- They’re properly maintained.
- Issues are fixed early.
- Drive cycles are completed correctly.
Pro Tips From a Mechanic (Real-World Advice)
If you want to pass your emissions test without wasting time or money, these real-world tips from a mechanic can make a huge difference. These are the small details most drivers overlook—but they often determine whether you pass or fail.
Don’t Clear Codes Right Before the Test
This is one of the biggest mistakes people make.
- Clearing codes resets all readiness monitors.
- The system will show “Not Ready.”
- You may fail even if the issue is fixed.
Always fix the problem and complete a proper drive cycle before testing.
Always Fix the Root Cause (Not Just the Symptoms)
It’s tempting to take shortcuts—but they usually don’t work.
- Replacing parts without diagnosis wastes money.
- Temporary fixes may not reduce emissions.
- The same issue will come back.
Diagnose first, then repair correctly.
Start With the Cheapest Fixes First
You don’t need to jump into expensive repairs right away.
Start with:
- Gas cap
- Air filter
- MAF sensor cleaning
- Spark plugs
Many vehicles pass emissions after these simple fixes.
Drive Your Car Regularly Before the Test
Letting your car sit too long can hurt emissions performance.
- Drive daily for a few days before testing.
- Mix city and highway driving.
- Helps clear carbon buildup and complete monitors
A well-driven car performs more cleanly.
Use an OBD2 Scanner Before You Go
Never go into an emissions test blind.
- Check for codes
- Confirm all monitors show “Ready.”
- Verify no hidden issues.
This one step can save you from an instant failure.
Don’t Ignore Small Symptoms
Minor issues can quickly turn into emissions failures.
Watch for:
- Slight rough idle
- Drop in fuel economy.
- Occasional hesitation
These early signs often point to emission-related problems.
Choose the Right Time for Testing
Timing can actually affect your results.
- Avoid testing with a cold engine.
- Go after a good drive.
- Avoid extreme weather conditions if possible.
A properly warmed-up engine performs at its best.
Final Mechanic Insight
Passing an emissions test isn’t about luck—it’s about preparation and attention to detail.
- Most failures occur when drivers rush the process or ignore minor issues.
- Take your time, follow the right steps, and your chances of passing go way up.
FAQs – Vehicle Emissions Test
Can I pass emissions after clearing codes?
No, clearing codes alone will not help you pass an emissions test. When you clear codes, your vehicle’s onboard system resets all readiness monitors to “Not Ready.” This means the system has not verified whether emissions components are functioning properly. During inspection, if monitors are not ready, the vehicle will likely fail—even if the check engine light is off. The correct approach is to fix the underlying issue, then drive the vehicle through a full drive cycle until all monitors show “Ready” before going for the test.
How long should I drive before an emissions test?
Ideally, you should drive your car for at least 15–20 minutes before the emissions test to fully warm up the engine and catalytic converter. A warm engine burns fuel more efficiently and produces lower emissions. If you recently repaired the vehicle or reset the battery, you may need to drive 50–100 miles over a few days to complete all readiness monitors. A mix of highway and city driving is best. Going to the test with a cold engine or an incomplete drive cycle can increase your chances of failure.
Will fuel additives really help reduce emissions?
Fuel additives can help in certain situations, but they are not a guaranteed fix. High-quality fuel system cleaners can remove carbon buildup from fuel injectors and improve combustion efficiency, potentially slightly reducing emissions. This can be helpful if your vehicle has minor issues. However, additives will not fix major problems like a bad catalytic converter, faulty sensors, or engine misfires. Think of them as a supporting solution—not a replacement for proper diagnosis and repair.
Can a bad battery cause emissions failure?
Yes, a weak or recently disconnected battery can indirectly cause an emissions test failure. When the battery is disconnected or loses power, the vehicle’s computer resets, clearing all stored data and readiness monitors. As a result, the system shows “Not Ready,” and the inspection station cannot verify emissions performance. Even if the vehicle has no actual faults, it may still fail. To avoid this, drive the car through a full drive cycle after any battery replacement or reset before going for the test.
Is it worth fixing a failed catalytic converter?
It depends on your vehicle’s value and overall condition. A catalytic converter is one of the most expensive emissions components, often costing $800 to $2500 or more to replace. If your car is relatively new or in good condition, replacing it is usually worth it to maintain performance and pass emissions. However, if the vehicle is older with multiple issues, the repair cost may exceed its value. In that case, you’ll need to evaluate whether repairing or replacing the vehicle makes more financial sense.
Conclusion
Passing a vehicle emissions test doesn’t have to be stressful or expensive—if you approach it the right way. Most failures come down to simple issues like a check engine light, an incomplete drive cycle, or minor maintenance problems that can be fixed quickly once you know what to look for.
The key is preparation. Always scan your vehicle for trouble codes, fix any underlying issues, and make sure all readiness monitors are set to “Ready” before heading to the test. Don’t forget the basics—warm up your engine, check your gas cap, and ensure your car is properly maintained.
From a mechanic’s perspective, the drivers who pass on the first try are the ones who take a little extra time to prepare instead of rushing into the test.
Fix small problems early, follow the right steps, and you’ll not only pass your emissions test—you’ll keep your engine running cleaner, smoother, and more efficiently for the long run.
